Guidelines for Digital Images
New Change (starting in 2015-2016): Black Borders are not required.
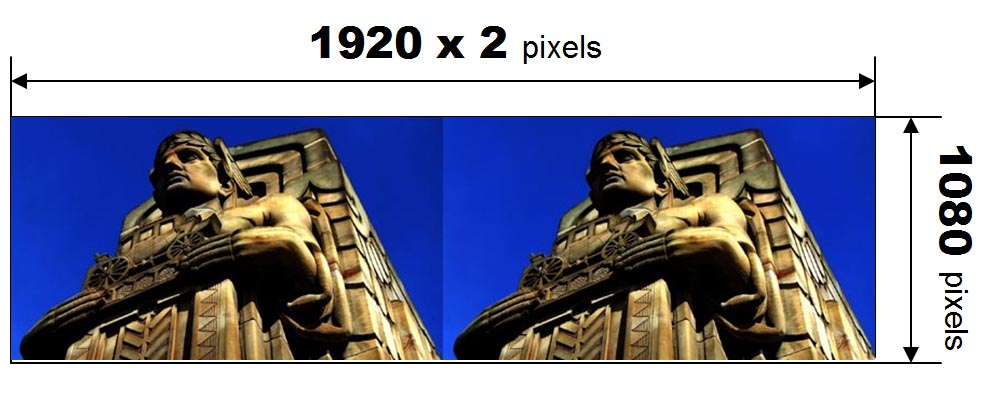
Our projectors project 1920x1080 size images. In the past we had required that you size your images exactly 1920x2 (3840) pixels wide by 1080 pixels tall and you had to use black borders to achieve this size. Now we do not have to do this. The projectors automatically will resize the images, plus without the borders we can demonstrate the effect of adjusting the stereo window in projection. You must still however limit the size of the images to 1080 pixels maximum height (or 1920 maximum width, but it is usually the height that is larger than 1080). The reason for this is that we do not want images that are unnecessarily too large. You should also try to keep the total size of the image under 2MB to speed up projection.
This is the size of an image that will occupy the entire projection area:
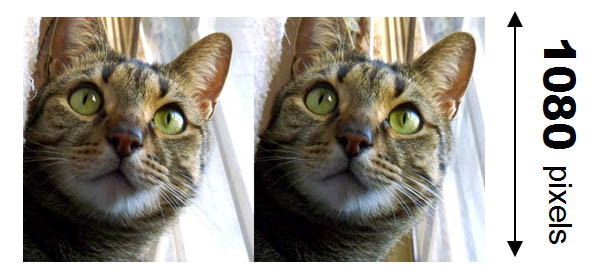
This image is more narrow and it is now acceptable without black borders:
1. Arrangement
Stereo Pairs must be submitted side by side in parallel format (one image containing the Left image in left side, right image in ride size). Borders are not required and are not encouraged, unless if you feel that they are needed for the presentation. We recommend that you use StereoPhoto Maker (SPM) to align your images, adjust the stereo window and resize, but you can also resize easily in any photo editing program (Photoshop, etc.)
2. Resolution
The images should be no bigger than 1080 pixels height or 1920 x 2 pixels wide. You can resize them using SPM as follows:
- Load the image
- Hit R (this bring up the resize dialog screen) or go: Edit -> Resize
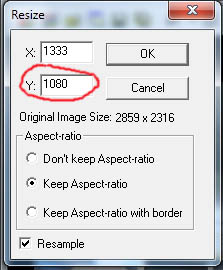
- Check: "Keep Aspect Ratio"
- Enter: Y: 1080 (if the resulting image has is wider than X=1920, then set X=1920 and Y will be less than 1080)
Here is an example:
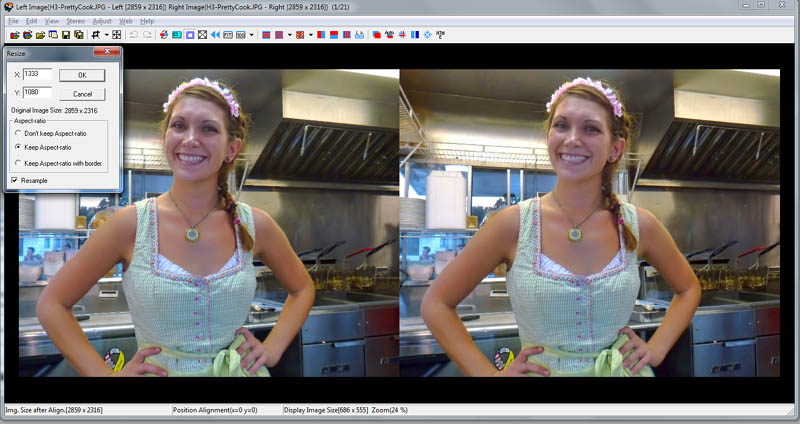
Here is how the SPM resize dialog should look:
- Hit S (this brings up the save screen), or go File -> Save Stereo Image
- Make sure you have the right folder and then save the file following the correct naming convention (see below). Always save a resized image as a separate file to preserve the original image.
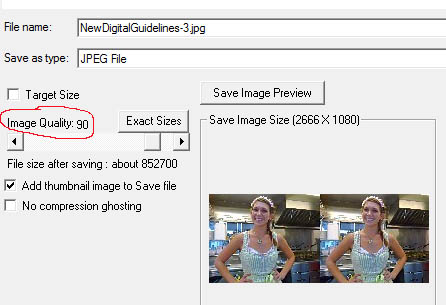
- If the size of the image is too large (larger than 2MB) you can reduce the image quality to 90, as in the example below. Remember to bring it back to maximum (99) later because SPM remembers and uses the last value.
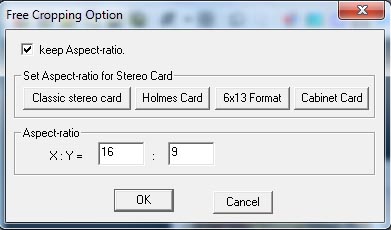
If you want to "force" the 16:9 aspect ratio during cropping with SPM, do the following: Click at the down arrow next to the cropping menu item. Select "Free Cropping Option". In the dialog that opens up, select "keep Aspect-ratio" and then enter 16 and 9 for X and Y, as shown in the screens below. This will force cropping at 16:9 aspect ratio.
|
|
|

Why would you want to do that? So that the image occupies the maximum available projection space and has a full impact. Note however than not every picture looks good with a wide ("landscape") aspect ratio. Certain pictures (portraits for example, like the two examples shown above) look better in a more square or narrow ("portrait") aspect ratio.
3. Naming
Follow this example (this is the complete name, including the extension, but you do not have to type .jpg as part of the name. Depending on how you have configured Windows Explorer, the .jpg might be invisible to you but added to the full file name):
ThemelisG_Title for 1st Image_1.jpg
ThemelisG_Title for 2nd Image_2.jpg
ThemelisG_Title for 3rd Image_3.jpg
- Your last name immediately followed by first initial (capitalized)
- Underscore
- Title of image (we recommend that you leave spaces between words because we can read the title easier)
- Underscore
- number 1, 2 or 3 for each image, your images will be projected in the order specified.
You MUST email your images to me the day before the meeting. The deadline for emailing is midnight of the day before the meeting (Monday).
I recommend that you email the images earlier, especially if you want to receive a feedback in case there are technical errors. I am able to view the images in my computer screen and see exactly how they will project. I will acknowledge all images received. If you do not receive a reply, there is remote chance that I did not receive your email. Try emailing to verify that I received them.
PostScript:
For those who are curious, here is what is involved in organizing the digital entries (thanks to Paul Gauche for this summary, and also for developing this system):
-
Get images from attendees
-
Fix incorrect file names so they work properly in our scoring spreadsheet
-
Resize incorrectly sized images so they project correctly
-
After all image files are in one folder, run SPM to create a Slide Show List
-
Put the Slide Show List into the scoring spreadsheet
-
Sort the scoring spreadsheet by Class (A and B) and by image number (1-3)
-
Randomize the order of the images for judging within each Class
-
Copy the randomized list of file names back into the SPM Slide Show List file
-
Transfer the new SPM Slide Show List from the scoring computer to the projection computer and run the competition.
Thank you!
George Themelis
Updated 8/25/2015
drt-3d @ live.com